Deploying Gatsby to Amazon S3 with Travis CI
I finally got around to moving the view layer of this website to Gatsby. In doing so, I also hooked up Continuous Integration. The stack is as follows:
- WordPress as API. Available at https://data.justinwhall.com.
- Gatsby as the view layer.
- Static files stored on Amazon S3.
- Distributed by AWS CloudFront.
- DNS managed at CloudFlare.
- TravisCI builds & deploys to Amazon S3 on Post or Page update and invalidates CloudFront cache.
That’s a lot to cover. In this blog post, I’m going to cover building a Gatsby site with WordPress and having TravisCI deploy the build to Amazon S3. In subsequent posts, I’ll cover DNS, distributing via CloudFront and triggering builds when creating, updating or deleting posts & pages in WordPress.
Requirements & assumptions
- You have an AWS account. There is a free tier.
- You have AWS CLI installed on your machine.
- You have a WordPress site.
- You have Gatsby CLI installed.
- You have a Gatsby Site on GitHub and cloned locally.
Setup Gatsby locally
You can use any starter you’d like but GatsbyCentral starter is a great option. My site, is a finished example.
Create a S3 bucket & attach a policy
Within the AWS console, navigate to S3 and then click “Create Bucket”. You should see the following:
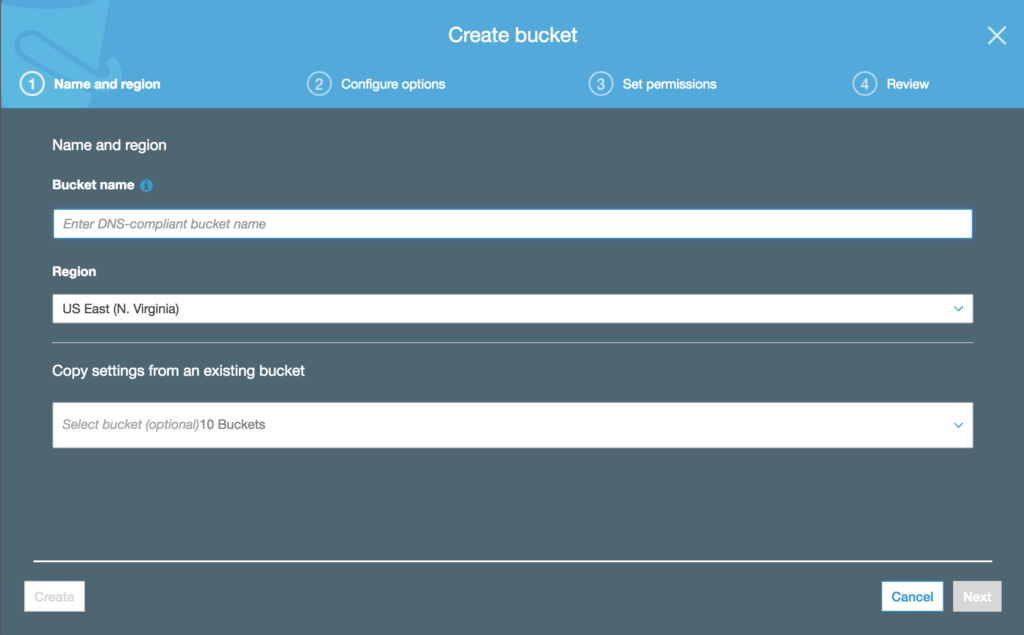
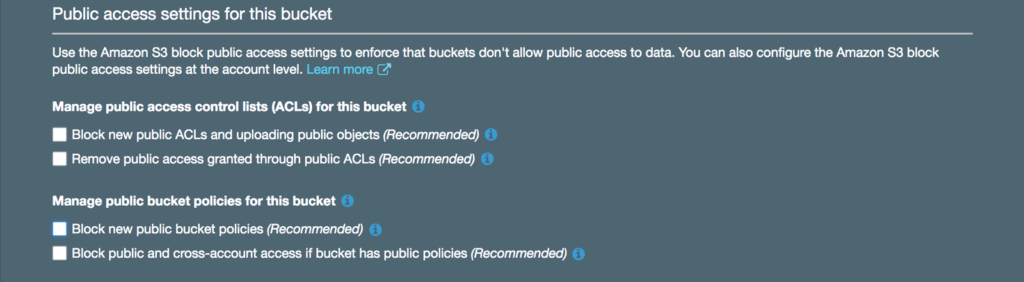
You can name the bucket whatever you’d like as long as it’s DNS compliant. Keep the region US East 1. Leave properties screen as is. For public access settings, uncheck all 4 boxes as we actually do want the bucket to be publicly available.
From here you can move through the rest of the setup with the default settings. Confirm, and your bucket will be created. To attach a bucket policy:
- Click your bucket.
- Permissions >
- Bucket Policy
- Add the following policy. Replace <YOUR BUCKET NAME> with the actual name of your bucket.
- This allows all (public) GET requests to the bucket.
{
    "Version": "2018-12-17",
    "Statement": [
        {
            "Sid": "PublicReadGetObject",
            "Effect": "Allow",
            "Principal": "*",
            "Action": [
                "s3:GetObject"
            ],
            "Resource": [
                "arn:aws:s3:::<YOUR BUCKET NAME>/*"
            ]
        }
    ]
}
Last, but not least, we need to enable static website hosting for the bucket. Like before:
- Click on your bucket >
- Static website hosting >
- Check “Use this website to host a website”
- Index document === index.html
- Error document === 404.html
- Save
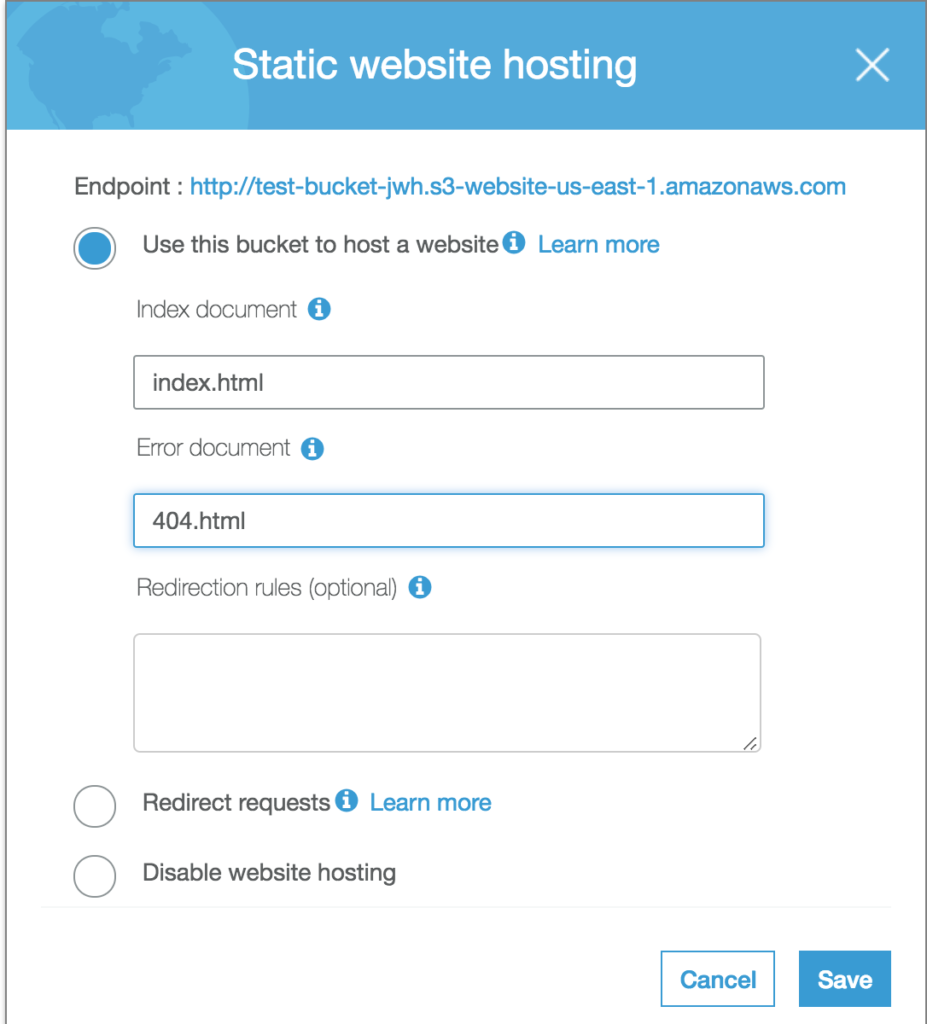
At this point, your bucket is ready to serve static files. Your S3 url is listed as the “endpoint” in the image above. To test your bucket you could manually up an index.html file. Alternatively, you could create an index.html file, navigate to where the file lives, and run:
aws s3 cp index.html s3://<YOUR BUCKET NAME>Build Gatsby & Deploy (manually) to AWS S3
From here, getting our built Gatsby site to AWS is actually quite simple.
Build Gatsby.
gatsby buildMove into public directory
cd publicCopy files to S3 bucket.
aws s3 cp . s3://<YOUR BUCKET NAME> --recursiveGive TravisCI access to our repository
Travis makes this pretty easy. Currently travis is migrating from .org to .com. My open source projects are still at .org but it’s totally possible Travis will ask you to add new projects at .com. Both links:
https://travis-ci.com/account/repositories
https://travis-ci.org/account/repositories
Either way, adding your repository should be a matter of toggling a switch.
Configure .travis.yml to deploy to AWS
Previously, we used AWS CLI to deploy to S3. With Travis, you could install the AWS CLI, add credentials to the profile and then deploy but there is an way way. Travis offers a number of config options that essentially wraps the AWS CLI and takes care of all of this for you. All that is up to you is to provide credentials.
You can find your credentials if you’re on a mac, by finding the “.aws” directory in your user directory. With that will be a “credentials” file. Within that you’ll find your aws_access_key_id and aws_secret_access_key keys. I’m no help for other operating systems but I’m sure your answer is quick google search away.
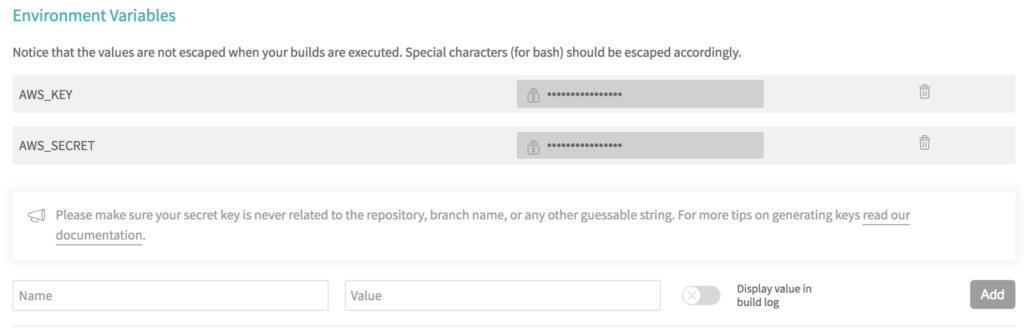
We’re going to add these as encrypted environment variables to Travis. To do so, navigate to your repository’s Travis build page @:
https://travis-ci.org/<githubusername>/<repository-name>In the upper right hand corner find the “More Options” button and then the “Settings” link in the drop down. This will bring you to a page where you can add your credentials. Absolutely make sure “Display Value in Build Log” is not on.
A note on security…
We’re sharing credentials with TravisCI. I’m not going to go into AWS Users or IAM, but be very aware of the privileges you are giving to Travis. It’s not that Travis is malicious, it’s more of a what if situation in the event Travis has a security breach. If you, for instance, give Travis access to billing, the situation could get ugly quick.
Lastly, we need make our travis config file:
language: node_js
node_js:
- 8.9.4
install: yarn
script: gatsby build
deploy:
  provider: s3
  access_key_id: $AWS_KEY
  secret_access_key: $AWS_SECRET
  bucket: "<YOUR BUCKET NAME>"
  skip_cleanup: true
  acl: public_read
  local_dir: public
Save this file in the root of your repository, and commit it to GitHub. This will trigger a build and deploy your built Gatsby site to S3. At this point, your Gatsby site should be fully functional on your S3 domain. Still left to do and coming in a subsequent post:
- Distribute this site with CloudFront.
- DNS. Point an actual domain at this site.
- Have WordPress trigger a Travis build when saving, updating or deleting a post.